
Candy Cane Cookies

Delicate peppermint-swirled sugar cookies with a crisp edge and tender center, perfect for holiday baking and gifting.

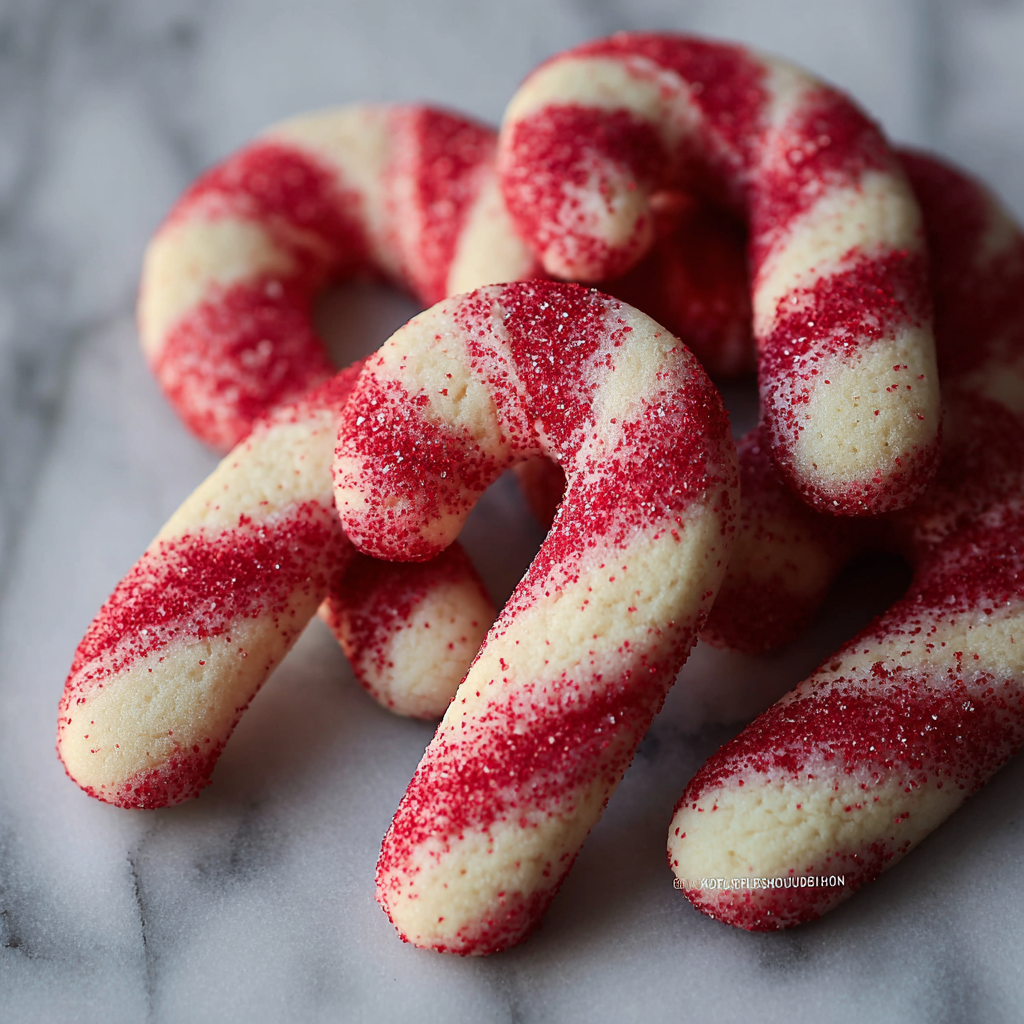
This recipe for Candy Cane Cookies is my holiday standby, the one I reach for when I want something that looks festive, tastes bright, and travels well. I first made these on a snowy December afternoon when I needed a small gift to bring to a neighbor. I wanted a cookie that felt classic but with a twist, and adding peppermint to a simple butter cookie dough and twisting in a ribbon of red coloring gave me exactly the visual and flavor note I was after. The cookies bake to a thin, slightly crisp edge with a tender center and a clean peppermint finish that balances the sweetness without overpowering that buttery base.
I discovered the technique of rolling ropes and twisting them together while experimenting with pastry shapes one year between holiday events. The pattern holds beautifully when you chill the shaped pieces, and a quick press of crushed candy cane onto the warm tops gives a satisfying crunch. These are easy enough to make with kids and forgiving if you make the ropes slightly thicker for a softer bite. They have become a favorite at our gatherings because they look elegant without requiring icing skills and they travel in a single layer tin without much worry.
Why You'll Love This Recipe
- Ready in about one hour from start to finish when you factor in chilling and baking, so they are great for last minute neighbor gifts or a quick holiday bake session.
- Uses pantry staples like all purpose flour, granulated sugar, and unsalted butter with just a splash of peppermint extract to transform the flavor into something seasonal and bright.
- Simple shaping technique creates a professional striped look without piping or royal icing; the visual impact is high and effort is low.
- Make ahead friendly these keep well for several days at room temperature and freeze beautifully for up to three months; bake, cool, and freeze between layers of parchment for easy holiday hosting.
- Flexible for dietary swaps you can replace butter with dairy free spread and use gluten free cup for cup flour if needed though texture will vary slightly.
- Project friendly for families the dough is safe to handle and kids love rolling, twisting, and pressing the candy cane bits on top.
I remember bringing a tin of these to a holiday potluck and watching them disappear first. A neighbor told me they looked like little peppermint canes, which made me smile because that was my exact intention. A small decoration on top immediately turns them into gifts for friends, and I often tuck a few in a cello bag with a ribbon. The pattern always sparks compliments and the peppermint flavor cleans the palate between bites of richer holiday foods.
Ingredients
- All purpose flour 2 and 1/2 cups. Choose a well sifted, all purpose flour for structure and a tender crumb. Spoon and level your measuring cup for accuracy. Brands like King Arthur or Gold Medal yield consistent results.
- Baking powder 1/2 teaspoon. Fresh baking powder provides a gentle lift and prevents dense cookies.
- Salt 1/4 teaspoon. Salt is essential to balance sweetness and bring out the butter flavor. Use fine table salt or a slightly smaller measure of kosher salt.
- Unsalted butter 3/4 cup softened. Use room temperature butter at about 65 to 68 degrees Fahrenheit for proper creaming. European style butter adds a richer flavor if you have it on hand.
- Granulated sugar 3/4 cup. Regular granulated sugar gives the slight crunch on the edge. If you prefer a chewier center a portion could be swapped for light brown sugar but the final color will be darker.
- Egg 1 large at room temperature. Allowing the egg to warm prevents the butter from seizing when you add it, ensuring a smooth dough.
- Vanilla extract 1 teaspoon. Pure vanilla extract amplifies the background flavor and pairs beautifully with peppermint.
- Peppermint extract 1/2 teaspoon. Use a quality peppermint extract and add sparingly; it is concentrated and a little goes a long way.
- Red gel food coloring as needed. Gel color provides a vivid stripe without adding too much liquid. Start with a drop and knead in until you reach the desired shade.
- Crushed candy canes or coarse sugar optional for topping. A light press into the warm cookie gives a crunchy festive finish and a visual cue to the peppermint flavor.
Instructions
Combine dry ingredientsIn a medium bowl whisk together the flour, baking powder, and salt until evenly mixed. Sifting is optional but helpful for removing lumps. This ensures an even distribution of the leavening agent so the cookies lift uniformly as they bake.Cream butter and sugarIn the bowl of a stand mixer fitted with the paddle attachment or using a hand mixer beat the softened butter and granulated sugar on medium speed until pale and fluffy, about two to three minutes. The goal is to incorporate air into the fat for a tender texture and a lighter crumb. Scrape the bowl once during mixing for even aeration.Add egg and extractsReduce speed to low and add the egg, vanilla, and peppermint extract. Mix until just combined. Scrape down the sides and bottom to avoid streaks and ensure the dough is homogeneous. The dough will be soft but hold together.Combine wet and dryAdd the dry mix gradually to the wet mixture on low speed or fold in by hand. Mix until just combined and no dry streaks remain. Avoid overmixing which develops gluten and yields tougher cookies. The finished dough should be smooth and slightly tacky.Divide and color the doughDivide the dough into equal portions, about half and half. Knead red gel food coloring into one portion until you reach the desired color. To create stripes roll each portion into ropes about 1/2 inch to 3/4 inch thick and twist one red rope and one plain rope together to form a candy cane pattern. Adjust the rope thickness for thinner stripes or a chunkier look.Chill and shapePlace the shaped pieces on a tray and chill for 10 to 20 minutes. Chilling firms the dough so the shapes hold in the oven and reduces spreading. If your kitchen is very warm chill longer. For thinner, crisper cookies roll ropes thinner and chill for 20 to 30 minutes.Bake and finishPreheat the oven to 350 degrees Fahrenheit. Arrange shaped pieces on a parchment lined baking sheet leaving an inch between pieces. Bake for 10 to 12 minutes until the edges are set and just beginning to take color. Cool on the sheet for five minutes, then transfer to a wire rack to finish cooling. While the tops are still warm press crushed candy cane or coarse sugar onto the cookies to adhere.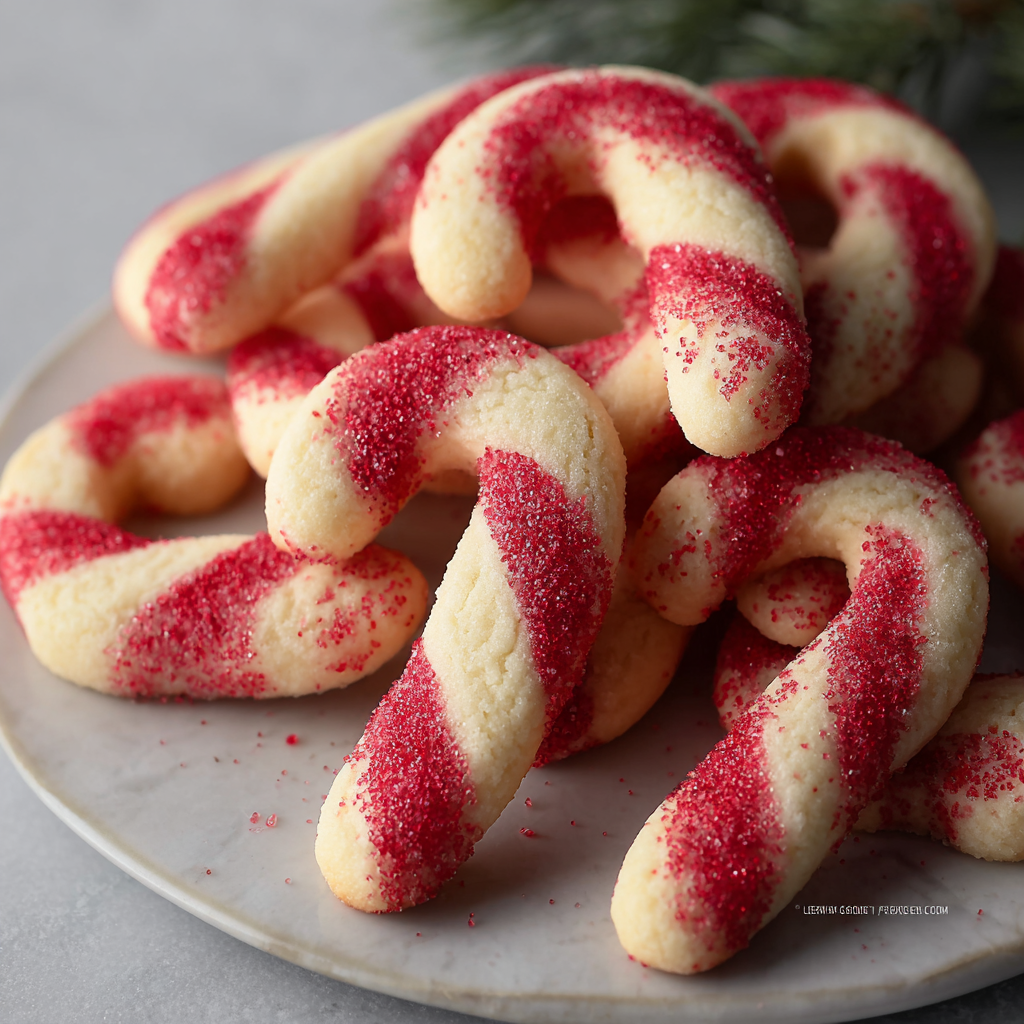
You Must Know
- These cookies freeze exceptionally well for up to three months. Freeze baked cookies in a single layer separated by parchment and defrost at room temperature to retain texture.
- The peppermint extract is potent. Stick to 1/2 teaspoon as specified or start with less and add more to taste to avoid a medicinal aftertaste.
- Roll ropes slightly larger for a chewier, more tender center. Thinner ropes yield a crisper cookie once baked at 350 degrees Fahrenheit for the same time.
- For consistent color use gel food coloring instead of liquid. Gel adds color without thinning the dough and helps the stripes stay defined.
My favorite aspect is how festive these look without elaborate decoration. Once a year we make a big batch and a bunch get boxed for teachers and friends, and every recipient notices the peppermint crunch. Changing rope width or using a pale pink instead of bright red gives a different mood to the cookie which makes this technique versatile. I find chilling every shaped piece for at least ten minutes is the single trick that prevents a flat mess and preserves the stripe like a candy cane.
Storage Tips
Store cooled cookies in an airtight container at room temperature for up to five days. Layer with parchment paper to prevent sticking. For longer storage freeze cooled cookies in a freezer safe container with parchment between layers up to three months. To reheat and restore slight chew warm for 30 seconds in a 300 degrees Fahrenheit oven or microwave briefly but avoid overheating which makes them hard. If you freeze unbaked shaped ropes lay them flat on a tray until solid then transfer to a bag. Bake from frozen adding one to two minutes to the baking time and check for set edges.
Ingredient Substitutions
If you need a dairy free version swap the unsalted butter for a plant based buttery spread measured cup for cup. Texture will be similar though flavor is slightly different. For gluten free use a cup for cup gluten free flour blend that contains xanthan gum to mimic structure. To reduce sugar slightly lower granulated sugar to 2/3 cup but note the edges will be less crunchy. If you prefer a milder peppermint note reduce the peppermint extract to 1/4 teaspoon and add a touch more vanilla. You can also press white sanding sugar rather than crushed candy cane for a softer bite.
Serving Suggestions
Serve alongside a cup of hot cocoa, peppermint tea, or a simple black coffee to balance sweetness. They make an attractive platter addition for holiday parties and look lovely wrapped in clear cellophane with a festive ribbon for gifting. For a dessert board pair with chocolate truffles and shortbread. Garnish with a small mint sprig or place a few whole mini candy canes beside the cookies for additional visual appeal.
Cultural Background
Striped peppermint cookies draw inspiration from classic European holiday confections that favor mint and sugar pairings. The candy cane motif has been a holiday symbol for generations and translating that into a baked good is a modern twist on seasonal candy baking. This technique of twisting colored dough ropes is a small scale adaptation of marbling and braided pastry work seen across many baking traditions.
Seasonal Adaptations
Adapt these cookies for winter celebrations by swapping red for deep green or gold for New Year festivities. In summer swap peppermint for a mild lemon extract and use yellow gel color for a sunny twist. For a Valentine version use pink with a dash of rosewater instead of peppermint and press chopped freeze dried strawberries on top.
Meal Prep Tips
For efficient holiday prep prepare the dough up to two days ahead, wrap tightly and refrigerate. You can also freeze individual ropes on a tray and then transfer to a freezer bag. On the day you want to bake, arrange chilled pieces on a sheet and bake as directed. This system allows you to produce many fresh baked cookies in batches without repeating the full assembly each time.
These cookies are a joy to share and a satisfying project whether you are baking solo or with family. The combination of buttery cookie and peppermint zing makes them a holiday go to and the simple technique means you will return to it year after year.
Pro Tips
Chill shaped pieces for at least 10 minutes to prevent spreading and preserve the stripe pattern.
Use gel food coloring to avoid adding extra liquid which can change dough texture.
Press crushed candy cane onto warm cookies to ensure it sticks and gives a crunchy finish.
If dough becomes too soft chill the whole bowl for 15 minutes and then continue shaping.
Measure flour by spooning into the cup and leveling for accurate results.
This nourishing candy cane cookies recipe is sure to be a staple in your kitchen. Enjoy every moist, high protein slice — it is perfect for breakfast or as a wholesome snack any time.
Tags
Candy Cane Cookies
This Candy Cane Cookies recipe makes perfectly juicy, tender, and flavorful steak every time! Serve with potatoes and a side salad for an unforgettable dinner in under 30 minutes.
Instructions
Combine dry ingredients
Whisk together flour baking powder and salt in a bowl until evenly mixed to ensure uniform lift and seasoning.
Cream butter and sugar
Beat softened butter and granulated sugar until pale and fluffy about 2 to 3 minutes to incorporate air for tender texture.
Add egg and extracts
Stir in the egg vanilla and peppermint extract until blended scraping the bowl to mix evenly and avoid streaks.
Combine wet and dry
Add dry mix gradually to the wet mixture on low speed mixing until just combined avoid overmixing to keep the cookies tender.
Divide and color the dough
Split dough in half knead red gel into one portion to desired color then roll ropes and twist together to create stripe patterns.
Chill and shape
Place shaped pieces on a tray and chill 10 to 20 minutes so patterns hold during baking chilled dough spreads less.
Bake and finish
Bake at 350 degrees Fahrenheit for 10 to 12 minutes until edges set cool 5 minutes on the sheet then transfer to a rack and press crushed candy cane onto warm tops if desired.
Last Step: Please leave a rating and comment letting us know how you liked this recipe! This helps our business to thrive and continue providing free, high-quality recipes for you.
Nutrition
Did You Make This?
Leave a comment & rating below or tag
@easywhiskrecipes on social media!
Categories:
You might also like...

Instant Pot Creamy Chicken and Rice
A quick and comforting one pot dinner of tender chicken, creamy rice, and vegetables cooked together in the Instant Pot for an easy weeknight meal.

Cinnamon Roll Pancake Stacks
Fluffy pancakes swirled with a warm cinnamon filling and finished with a silky cream cheese glaze. Perfect for weekend brunches and cozy mornings.

Caramel Apple Cheesecake Bars
Buttery graham crust, creamy cheesecake, spiced Granny Smith apples, crunchy streusel, and a ribbon of homemade caramel — perfect dessert bars for gatherings.
Did You Make This?
Leave a comment & rating below or tag @easywhiskrecipes on social media!
Rate This Recipe
Share This Recipe
Enjoyed this recipe? Share it with friends and family, and don't forget to leave a review!
Comments (1)
This recipe looks amazing! Can't wait to try it.
Comments are stored locally in your browser. Server comments are displayed alongside your local comments.

Hi, I'm Sophie!
What's Popular

30-Minute Meals!
Join to receive our email series which contains a round-up of some of our quick and easy family favorite recipes.