
>>

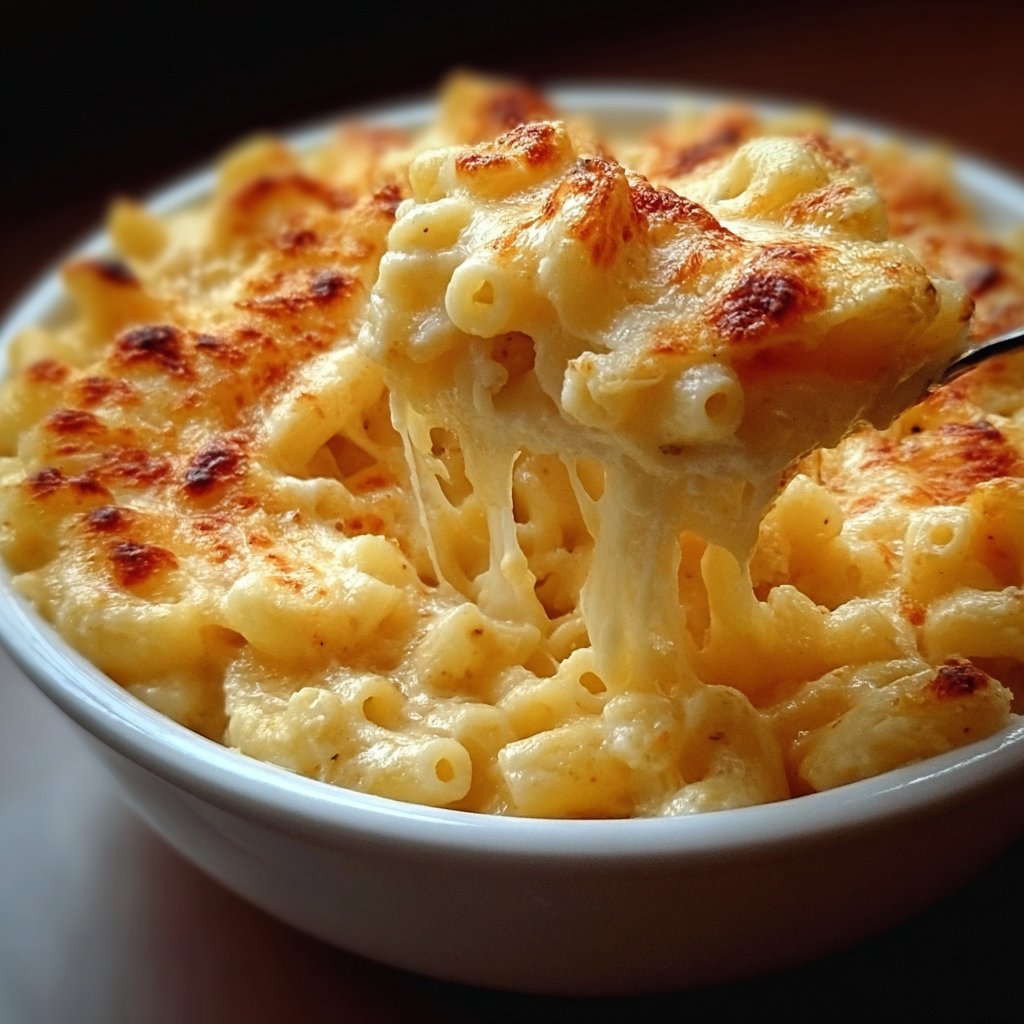
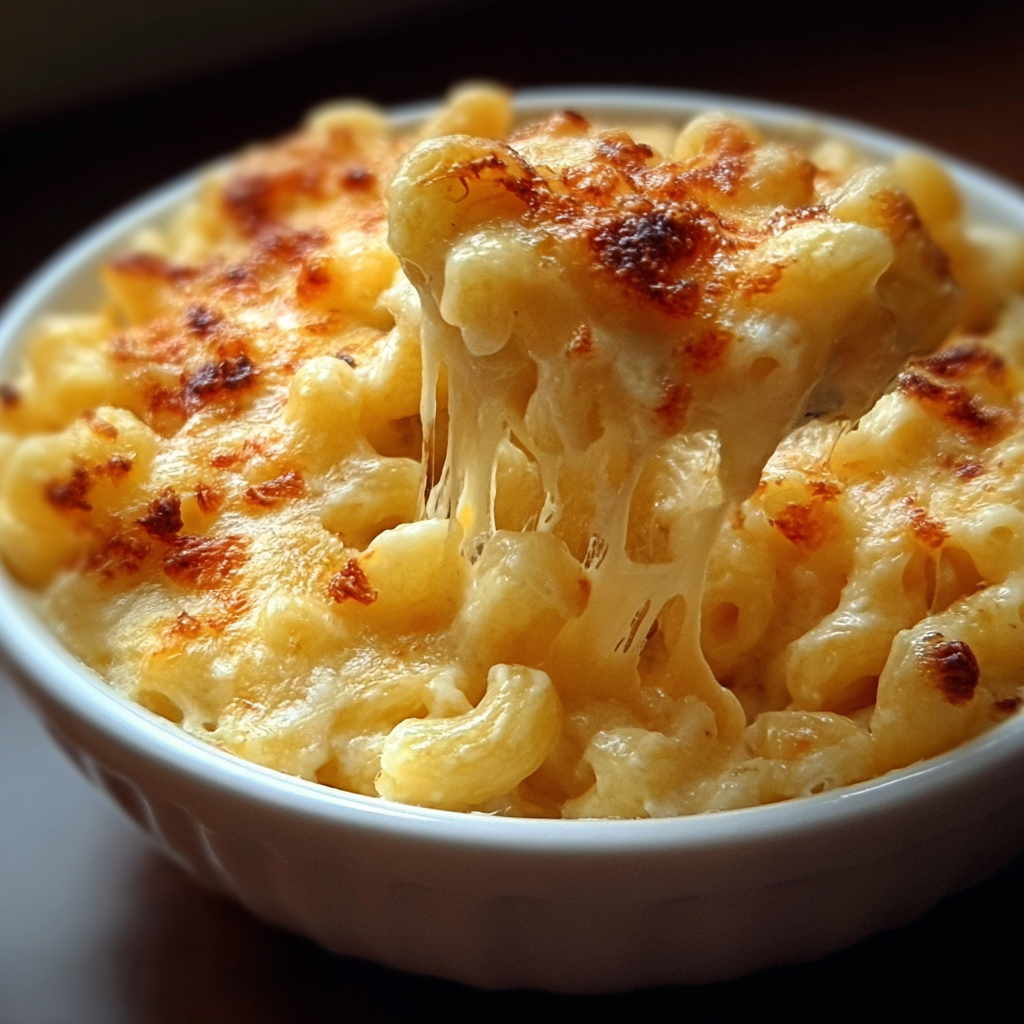
A creamy, cheesy baked mac and cheese with a crunchy panko topping—simple ingredients, comforting results, and easy enough for weeknights.

This baked mac and cheese is the sort of dish that immediately signals home. I first developed this version one rainy Sunday when I wanted something simple, nostalgic, and reliably comforting. The result was a rich, velvety cheese sauce that clung to every elbow noodle and a golden panko crust that added the perfect contrast. It quickly became our family's favorite—served on busy weeknights, at casual gatherings, and even boxed up for friends going through big life moments.
What makes this rendition special is its balance of technique and accessibility. With a proper roux, warm milk gently incorporated, and a good sharp cheddar, the sauce becomes silky without being gluey. Topping it with panko instead of traditional breadcrumbs gives a lighter, crisp finish. I remember the first time my partner declared it the best I've ever made because the sauce stayed creamy even after reheating. That little victory taught me that the right steps matter, but the dish still remains forgiving.
I learned that a little attention to temperature and whisking makes all the difference. My in-laws asked for the recipe after their first bite, and my kids now insist on the panko top. It’s one of those dishes that both rewards care and forgives shortcuts.
My favorite part is how forgiving this approach is. You can tweak the cheese blend or add a spoonful of Dijon for complexity, and it still turns out comforting. Guests often ask for seconds, and reheated portions retain their creaminess if you add a splash of milk before warming. The regular requests from friends and family have made this one of my most-shared dishes.
Cool the dish to room temperature before refrigerating to prevent condensation. Store leftover portions in an airtight container for up to three days. To freeze, transfer into a freezer-safe container and press a layer of plastic wrap directly on the surface to reduce ice crystals; freeze for up to three months. Reheat single portions in the oven at 325 degrees Fahrenheit until warmed through, adding a tablespoon of milk if the sauce looks dry. Microwaving works for quick reheats but may require stirring halfway through to ensure even warming.
If you need to swap ingredients, try these tested alternatives. For a richer sauce use half-and-half instead of whole milk, reducing it slightly to avoid an overly heavy finish. For gluten-free, substitute a certified gluten-free elbow pasta and use a 1 to 1 gluten-free flour or cornstarch slurry (1 tablespoon cornstarch whisked with 2 tablespoons cold water) to thicken. For a different flavor profile, blend 1 cup cheddar with 1 cup Gruyère or smoked gouda. Nutritional yeast can add umami for a lighter vegetarian-friendly version, though it alters the classic taste.
Serve this dish alongside a crisp green salad dressed with a bright vinaigrette to cut through the richness. It pairs well with roasted vegetables such as broccoli or Brussels sprouts, and barbecue chicken for a heartier plate. For gatherings, spoon into small ramekins for individual servings and broil briefly to heighten the topping. Garnish with chopped chives or a light dusting of smoked paprika for color and a slight smoky note.
Macaroni and cheese is a quintessential American comfort food with roots tracing back to European cheese and pasta casseroles. The modern baked version gained popularity in the United States in the 19th century and became a household staple thanks to its simplicity and affordability. Over time it evolved regionally—from luxury cheese-laden versions to everyday casseroles—and today it appears in countless adaptations from creamy stovetop pots to upscale versions featuring artisanal cheeses and truffle oil.
In colder months, add roasted butternut squash or caramelized onions to the mix for depth and heartiness. During spring and summer, stir in blanched asparagus tips or peas and top with fresh breadcrumbs mixed with lemon zest for brightness. Holiday variations can include a sprinkling of toasted pecans on the breadcrumb layer for texture and a hint of nuttiness that complements the cheddar.
For easy weeknight dinners, fully assemble the dish, cover tightly, and refrigerate. When ready to serve, bake from cold and add 10 to 15 minutes to the baking time, or bake at 350 degrees Fahrenheit until bubbly. For make-ahead freezing, bake until just set, cool completely, then freeze; finish under the oven for 10 to 15 minutes covered, then uncover to brown the top. Use oven-safe glass or metal containers for direct reheating convenience.
This baked mac and cheese is both a learning project and a reliable comfort classic. With straightforward technique and a little attention to cheese quality and timing, you’ll have a family favorite that shows up at weeknight dinners and celebrations alike. Share it with people you love and don’t be surprised if it becomes your signature cozy dish.
Shred cheese from a block for better melting and flavor compared to pre-shredded cheese.
Reserve a little pasta cooking water to loosen the sauce if it becomes too thick.
Toast panko in a skillet with a little butter before topping for extra crunch and color.
Allow the dish to rest 5 minutes after baking so the sauce sets and servings hold shape.
This nourishing classic baked mac and cheese recipe is sure to be a staple in your kitchen. Enjoy every moist, high protein slice — it is perfect for breakfast or as a wholesome snack any time.
This Classic Baked Mac and Cheese recipe makes perfectly juicy, tender, and flavorful steak every time! Serve with potatoes and a side salad for an unforgettable dinner in under 30 minutes.
Bring a large pot of salted water to a boil. Add 8 oz elbow macaroni and cook until al dente, about 7 to 8 minutes. Drain and set aside, reserving up to 1 cup of pasta water.
In a medium saucepan over medium heat melt 4 tablespoons unsalted butter. Whisk in 2 tablespoons flour and cook for about 1 minute until pale and fragrant to remove raw flour taste.
Gradually whisk in 2 cups whole milk, bringing to a gentle simmer. Continue whisking until sauce thickens and coats the back of a spoon, about 4 to 6 minutes.
Remove from heat and stir in 2 cups shredded sharp cheddar until fully melted. Season with salt and pepper and adjust consistency with reserved pasta water if needed.
Mix the drained macaroni into the cheese sauce until evenly coated. Transfer to a lightly greased 8x8 inch baking dish for even baking.
Sprinkle 1 cup panko breadcrumbs over the surface, optionally tossed with 1 tablespoon melted butter. Bake at 350 degrees Fahrenheit for 20 to 25 minutes until golden and bubbling. Rest 5 minutes before serving.
Last Step: Please leave a rating and comment letting us know how you liked this recipe! This helps our business to thrive and continue providing free, high-quality recipes for you.
Leave a comment & rating below or tag
@easywhiskrecipes on social media!

A quick and comforting one pot dinner of tender chicken, creamy rice, and vegetables cooked together in the Instant Pot for an easy weeknight meal.

Fluffy pancakes swirled with a warm cinnamon filling and finished with a silky cream cheese glaze. Perfect for weekend brunches and cozy mornings.

Buttery graham crust, creamy cheesecake, spiced Granny Smith apples, crunchy streusel, and a ribbon of homemade caramel — perfect dessert bars for gatherings.
Leave a comment & rating below or tag @easywhiskrecipes on social media!
Enjoyed this recipe? Share it with friends and family, and don't forget to leave a review!
This recipe looks amazing! Can't wait to try it.
Comments are stored locally in your browser. Server comments are displayed alongside your local comments.

Join to receive our email series which contains a round-up of some of our quick and easy family favorite recipes.
