
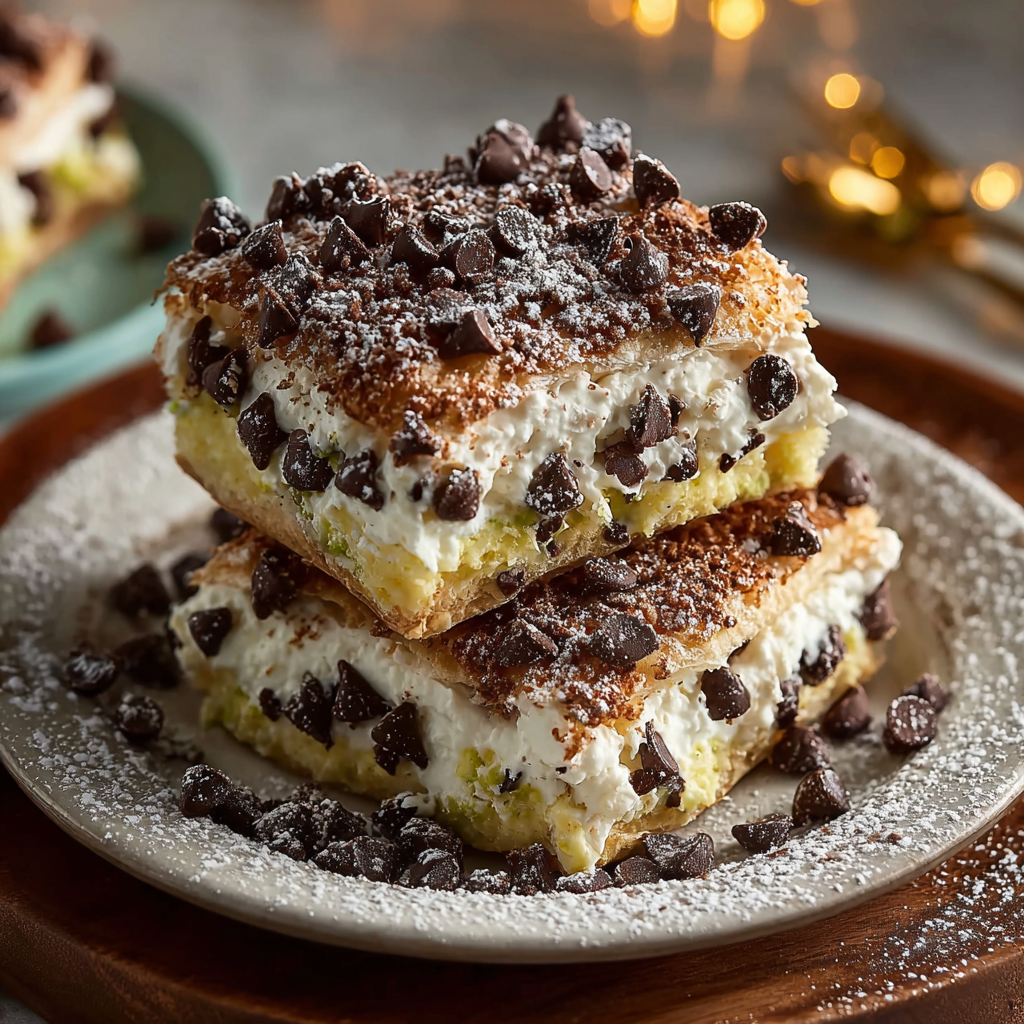
Classic Cannoli Squares

All the creamy, crunchy joy of cannoli in easy-to-cut squares—ricotta-studded filling between buttery pie crusts, finished with chocolate chips and optional pistachios.
This recipe for Classic Cannoli Squares is my shortcut to bringing a little Italian pastry magic to weeknight desserts and holiday gatherings. I first developed this version during a busy holiday season when I wanted the crisp-sweet contrast of a traditional cannoli but needed something I could slice and serve easily for a crowd. The ricotta filling—lightened with a touch of cinnamon and folded with mini chocolate chips—reminded me of the first time I tasted a street-side cannoli in a small Sicilian bakery. The squares keep the essential flavor profile: creamy, slightly tangy ricotta, a whisper of vanilla, and chocolate that gives a pleasant snap against the soft interior.
What makes these squares special is how effortlessly the textures come together. The pre-made pie crust bakes to a golden, flaky shell that contrasts beautifully with a silky, lightly sweetened ricotta layer. I prefer whole-milk ricotta for a richer mouthfeel, but if you want a lighter dessert you can substitute low-fat ricotta. Over the years, I have made these for potlucks, brunches, and casual dinner parties; guests love the familiar cannoli flavor without the fuss of shaping tubes or piping delicate shells. This is the recipe I reach for when I want the spirit of a classic pastry with minimal hands-on time.
Why You'll Love This Recipe
- Ready in under an hour from start to finish—about 20 minutes active time and 30–35 minutes baking—perfect for last-minute entertaining.
- Uses pantry staples and one package of pre-made dough, so you can make it without hunting for specialty ingredients.
- Make-ahead friendly: the filling can be mixed earlier in the day and refrigerated until assembly, saving time on serving day.
- Crowd-pleaser texture: a flaky, buttery crust paired with a creamy, chocolate-studded center that appeals to both kids and adults.
- Flexible finishing options—add chopped pistachios, maraschino cherries, or extra chocolate chips to match the occasion or dietary needs.
- Simple ingredient swaps allow for lighter or indulgent versions: low-fat ricotta for fewer calories, dark chocolate chips for deeper flavor.
In my experience, these squares quickly became a family favorite. My sister asked for them at every birthday brunch last year, and neighbors have accused me—affectionately—of making more than I admit because the pan disappears fast. The recipe balances convenience and authenticity in a way that makes it a reliable go-to.
Ingredients
- Ricotta cheese (15 ounces): Whole-milk ricotta yields the creamiest texture and the truest flavor; look for high-quality brands labeled "whole milk" like Galbani or Belgioioso. For a lighter option, substitute low-fat ricotta but expect slightly less richness.
- Powdered sugar (1 cup): Confectioners' sugar dissolves smoothly into ricotta for a silken filling. If you prefer less refined sugar, try coconut sugar blended fine, but it will alter color and flavor slightly.
- Vanilla extract (1 teaspoon): Use pure vanilla extract for the best aromatic lift; imitation vanilla will work but lacks depth.
- Cinnamon (1/2 teaspoon): Adds warmth and cuts the sweetness; freshly ground cinnamon gives better aroma.
- Mini chocolate chips (1/2 cup): Dark mini chips enrich the filling; regular semisweet also works. Mini chips disperse more evenly through the ricotta.
- Pre-made pie crusts (14 ounces): One package typically contains two crusts—use one for the bottom and one for the top. Refrigerated crusts from major brands bake reliably into a flaky shell.
- Egg (1, beaten): For an egg wash to encourage browning—use one large egg beaten with a tablespoon of water.
- Sugar (1 tablespoon): Sprinkle on top for sparkle and a slightly crisp finish.
- Optional garnishes: Chopped pistachios, maraschino cherries, extra chocolate chips to garnish after baking for color and texture contrast.
Instructions
Prepare the Filling: In a medium mixing bowl, scoop 15 ounces of ricotta and press through a fine-mesh strainer or whisk vigorously to remove excess liquid and ensure a silky base. Add 1 cup powdered sugar, 1 teaspoon vanilla extract, and 1/2 teaspoon cinnamon. Fold in 1/2 cup mini chocolate chips until evenly distributed. Taste and adjust sweetness—if your ricotta is tangy, an extra tablespoon of powdered sugar can balance it. Chill briefly if your ricotta is warm. Preheat the Oven: Set your oven to 375°F (190°C) and position a rack in the middle of the oven. Preheating fully ensures the crust sets quickly and turns golden rather than soggy. Line the Pan with Bottom Crust: Unroll one 14-ounce package crust and press it into a 9x9-inch baking dish, trimming any excess and crimping the edges. Patch any thin spots with trimmings so the bottom is even. Pricking the bottom lightly with a fork can prevent large air pockets. Add the Filling: Spoon the ricotta mixture into the prepared crust and spread it to an even layer using an offset spatula. Aim for about a 3/4-inch layer so each square has a balanced ratio of filling to crust. Top Crust and Egg Wash: Roll out the second crust and lay it gently over the filling. Trim and seal the edges by pressing with a fork or crimping with your fingers. Brush the top with the beaten egg and sprinkle with 1 tablespoon sugar for a glossy, slightly crunchy finish. Bake Until Golden: Bake in the preheated oven for 30–35 minutes, rotating the pan halfway through if your oven has hot spots. Watch for a deep golden color—if the edges brown too quickly, tent with foil for the final 10 minutes. Cool Before Cutting: Remove from the oven and let the pan cool on a wire rack for at least 30 minutes to allow the filling to set. For cleaner slices, chill in the refrigerator for 1 hour before cutting into 9 or 12 squares, depending on desired portion size.
You Must Know
- High in protein relative to other desserts due to ricotta, but also calorie-dense—freezes well for up to 3 months when wrapped tightly.
- Store leftover squares refrigerated in an airtight container for up to 4 days; bring to room temperature before serving for best texture.
- If you prefer a firmer, less moist filling, drain the ricotta in a fine sieve lined with cheesecloth in the refrigerator for 1–2 hours before mixing.
- Substituting low-fat ricotta reduces calories but will produce a less creamy mouthfeel; adding 1–2 tablespoons mascarpone restores richness without much extra effort.
What I love most about this version is how forgiving it is: a slightly rustic top crust or a perfectly even cut both taste delightful. Family members comment on the candy-like pop of the chocolate chips and the toastiness of the crust, and children tend to reach first for pieces with extra pistachio or cherry garnish. The recipe’s simplicity makes it a reliable entrant at potlucks and brunches alike.
Storage Tips
Keep squares refrigerated in a single layer or stacked with parchment between pieces in an airtight container for up to 4 days. For longer storage, wrap the cooled whole pan tightly in plastic wrap and foil, then freeze up to 3 months; thaw overnight in the refrigerator before slicing. To refresh a chilled square, bring to room temperature for 20–30 minutes or warm in a 300°F oven for 5–7 minutes to restore flakiness.
Ingredient Substitutions
For a lighter approach, use low-fat ricotta and reduce powdered sugar to 3/4 cup, tasting as you go. To deepen flavor, swap half the powdered sugar for honey (about 2 tablespoons) and reduce total to 3/4 cup plus honey for moisture. If dairy-free is required, try a firm silken tofu blended with a touch of nondairy milk and powdered sugar, though texture and flavor will differ from traditional ricotta. For gluten-free crusts, use a roll-out gluten-free pie dough and monitor baking time closely.
Serving Suggestions
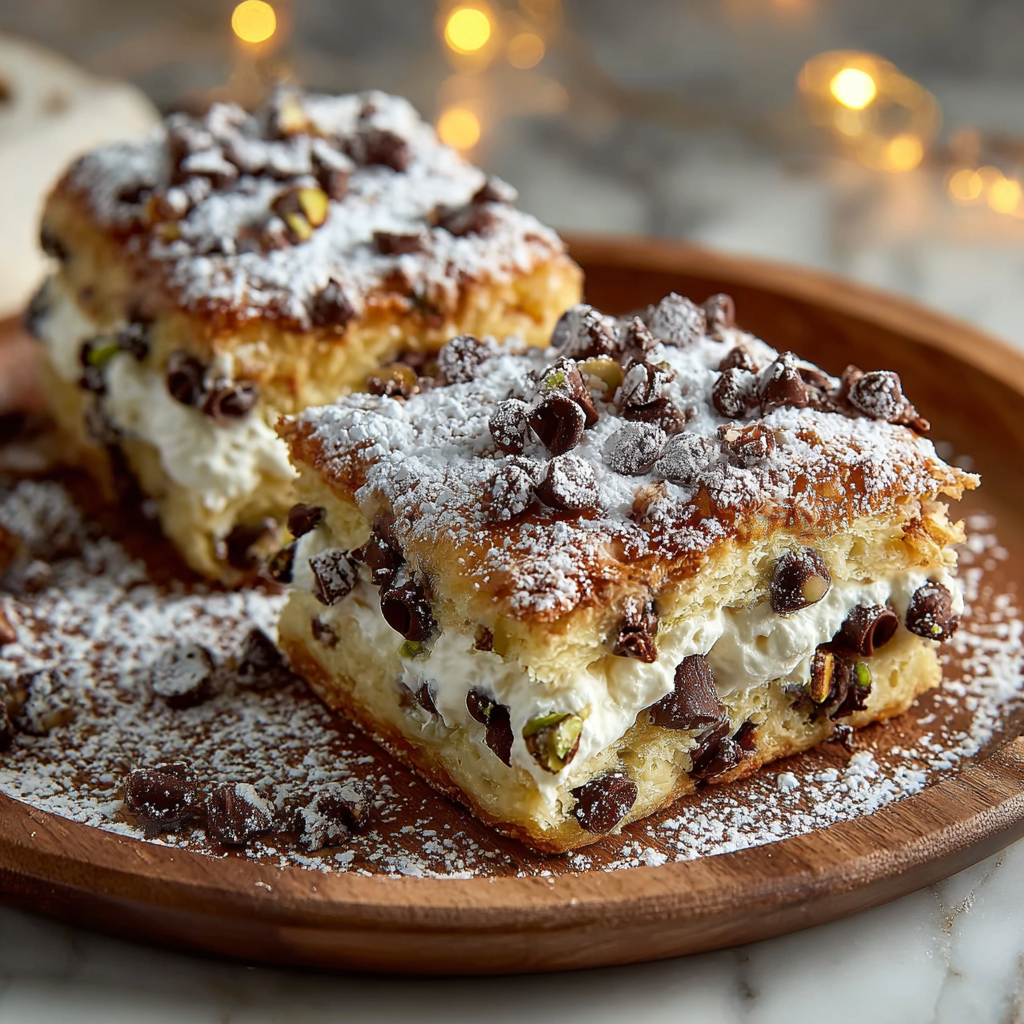
Serve squares warm or at room temperature. Garnish each with a sprinkle of chopped pistachios and a halved maraschino cherry for classic presentation, or dust lightly with additional powdered sugar. Pair with strong coffee or espresso, a citrusy dessert wine, or a bright fruit compote to cut through the richness. For brunch, serve alongside fresh berries and whipped cream.
Cultural Background
These squares are inspired by the beloved Sicilian cannolo—traditionally a fried tube filled with sweetened ricotta. Converting that concept into a tray-baked format keeps the essential ricotta-and-chocolate combination while making preparation approachable for home bakers. Variations across Italy include additions like candied citrus peel, pistachios, or ricotta blended with mascarpone; this interpretation nods to those flavors while prioritizing convenience.
Seasonal Adaptations
In winter, fold 1 tablespoon of orange zest into the filling and sprinkle the top with finely chopped candied orange peel. For spring or summer, lighten the squares by adding a layer of lemon curd between the crust and filling or topping each square with macerated berries. During the holidays, swap mini chocolate chips for chopped toasted hazelnuts and a pinch of ground cloves for a warm spice profile.
Meal Prep Tips
Mix the filling the night before and store it chilled. Line the pan with crust and keep covered in the fridge; assemble and bake on the day of serving for the freshest texture. If baking multiple pans, rotate racks and swap positions halfway through baking to ensure even browning. Use a sharp serrated knife chilled in the freezer for 10 minutes before slicing to get clean edges.
These Classic Cannoli Squares celebrate the flavors of a beloved pastry in an accessible, slice-and-serve format. Whether for casual dessert, a brunch spread, or a festive gathering, they deliver the same satisfying contrast of flaky crust and creamy, chocolate-studded filling—easy to make and even easier to enjoy.
Pro Tips
Drain ricotta in a sieve for 1–2 hours to reduce moisture and prevent a soggy filling.
Chill the pan for 30 minutes before slicing to get cleaner cuts.
Tent with foil if edges brown too quickly during baking.
Use mini chocolate chips so they distribute evenly through the filling.
This nourishing classic cannoli squares recipe is sure to be a staple in your kitchen. Enjoy every moist, high protein slice — it is perfect for breakfast or as a wholesome snack any time.
Tags
Classic Cannoli Squares
This Classic Cannoli Squares recipe makes perfectly juicy, tender, and flavorful steak every time! Serve with potatoes and a side salad for an unforgettable dinner in under 30 minutes.
Ingredients
Filling
Crust & Finish
Instructions
Prepare the Filling
Press ricotta through a fine-mesh sieve or whisk to remove excess liquid. Combine with powdered sugar, vanilla, cinnamon, and mini chocolate chips until smooth. Chill briefly if necessary.
Preheat Oven
Preheat oven to 375°F (190°C) and position a rack in the center for even baking.
Line the Pan
Press one pie crust into a 9x9-inch baking dish, trim and crimp edges, and prick lightly to prevent large air pockets.
Add Filling
Spread the ricotta mixture evenly over the bottom crust to about 3/4-inch thickness using an offset spatula.
Top Crust & Egg Wash
Lay the second crust over the filling, seal the edges, brush with beaten egg, and sprinkle with granulated sugar.
Bake
Bake for 30–35 minutes until golden brown, tenting with foil if edges brown too quickly. Rotate pan halfway if needed.
Cool & Slice
Cool at least 30 minutes on a wire rack (or chill 1 hour) before slicing into 9 squares. Garnish as desired.
Last Step: Please leave a rating and comment letting us know how you liked this recipe! This helps our business to thrive and continue providing free, high-quality recipes for you.
Nutrition
Did You Make This?
Leave a comment & rating below or tag
@easywhiskrecipes on social media!
Categories:
You might also like...

Instant Pot Creamy Chicken and Rice
A quick and comforting one pot dinner of tender chicken, creamy rice, and vegetables cooked together in the Instant Pot for an easy weeknight meal.

Cinnamon Roll Pancake Stacks
Fluffy pancakes swirled with a warm cinnamon filling and finished with a silky cream cheese glaze. Perfect for weekend brunches and cozy mornings.

Caramel Apple Cheesecake Bars
Buttery graham crust, creamy cheesecake, spiced Granny Smith apples, crunchy streusel, and a ribbon of homemade caramel — perfect dessert bars for gatherings.
Did You Make This?
Leave a comment & rating below or tag @easywhiskrecipes on social media!
Rate This Recipe
Share This Recipe
Enjoyed this recipe? Share it with friends and family, and don't forget to leave a review!
Comments (1)
This recipe looks amazing! Can't wait to try it.
Comments are stored locally in your browser. Server comments are displayed alongside your local comments.

Hi, I'm Sophie!
What's Popular

30-Minute Meals!
Join to receive our email series which contains a round-up of some of our quick and easy family favorite recipes.