
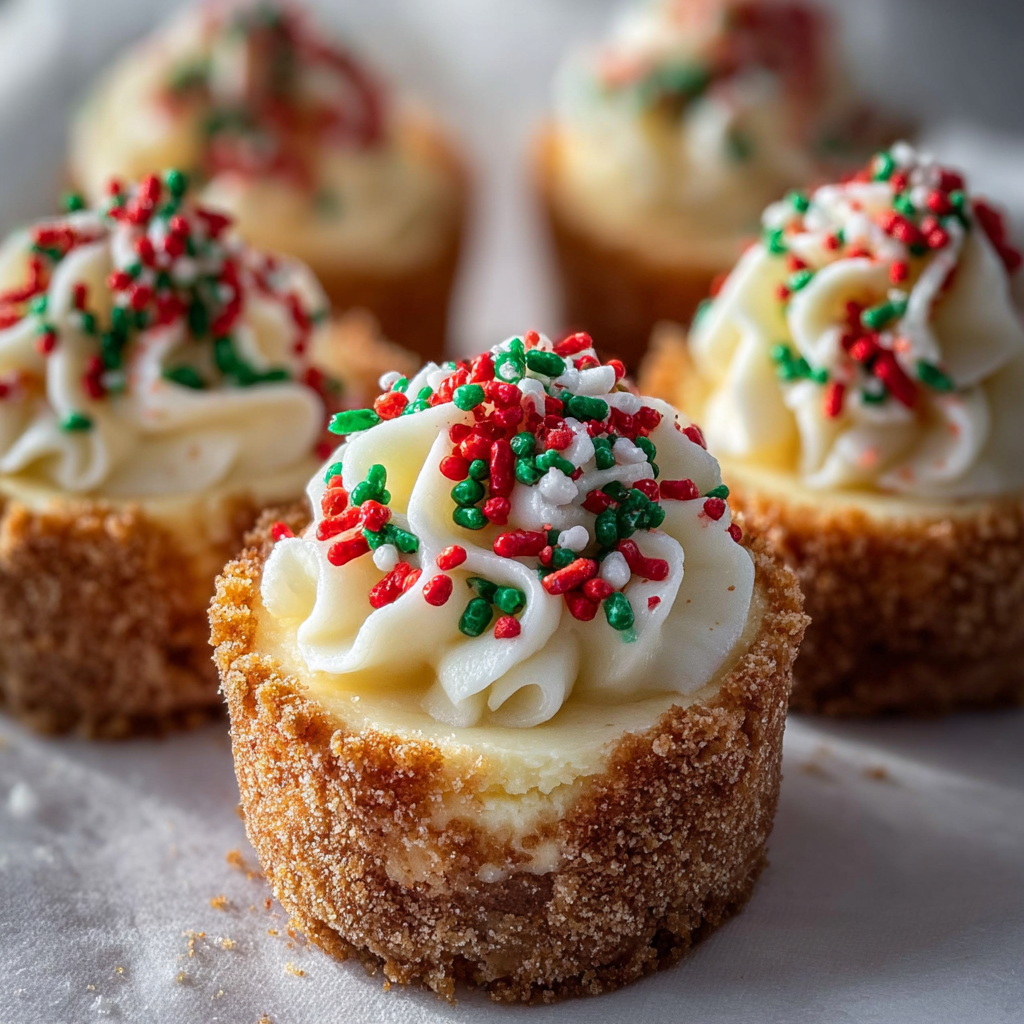
Mini Christmas Cheesecakes

Tiny festive cheesecakes with a buttery graham crust and a creamy vanilla filling, topped with red and green sprinkles—perfect for holiday parties and last-minute gifts.

This recipe for Mini Christmas Cheesecakes has become my go-to for holiday gatherings. I stumbled on the idea one December when I wanted something festive, portable, and quick to make for a neighborhood cookie exchange. These small treats capture everything I love about a classic cheesecake—silky cream cheese filling, a buttery graham base—without the fuss of slicing a large tart. My kids love decorating them, and I always make a double batch because they disappear before I can take photos.
What makes these special is the balance of textures and the joyful presentation. The crust offers a subtle crunch and a warm, buttery flavor that contrasts with the smooth, barely tangy filling. Baking them in a mini cupcake pan keeps the centers tender and just-set, so the result is creamy rather than dense. I learned to watch the visual cue of the slight jiggle in the center; that means they will finish firming as they cool. These little cheesecakes bring back holiday memories for my family and are a reliable crowd-pleaser when I need a quick, festive dessert.
Why You'll Love This Recipe
- Quick to prepare: active prep time is about 20 minutes and they bake in 20 minutes, so you can have a dozen ready in under an hour.
- Kid-friendly assembly: kids can help press the crust, pour filling, and add red and green sprinkles for a fun holiday activity.
- Portable and giftable: the mini size makes them ideal for parties, cookie exchanges, or boxed gifts for neighbors.
- Uses pantry staples: cream cheese, sugar, eggs, sour cream, and graham crackers—easy to find in any supermarket.
- Make-ahead friendly: refrigerate overnight for best texture, or freeze for longer storage and thaw in the fridge before serving.
I often make a double batch because the first round never lasts long. One December I took these to a small office party, and a coworker declared them the best thing on the dessert table—simple praise but memorable. They feel like the holidays in bite-sized form, and their ease makes them useful for last-minute plans.
Ingredients
- Cream cheese (8 oz): Use full-fat cream cheese for the creamiest texture. I prefer Philadelphia brand for a consistent, tangy flavor; let it soften to room temperature to avoid lumps when mixing.
- Sugar (1/2 cup): Regular granulated sugar balances the tang of the cream cheese; you can substitute fine caster sugar for a smoother batter.
- Vanilla extract (1 tsp): Pure vanilla extract adds depth—Madagascar or Mexican vanilla are great choices for a warm, rich aroma.
- Sour cream (1/2 cup): Adds silkiness and a slight tang that keeps the filling from feeling too sweet—use full-fat for the best mouthfeel.
- Eggs (2 large): Room-temperature eggs incorporate more easily and help stabilize the filling without adding density.
- Graham crackers (1/4 cup, crushed): Gives a classic buttery base; pulse in a food processor or place in a bag and crush with a rolling pin.
- Butter (1/4 cup, melted): Binds the crust and toasts the graham flavor—unsalted butter lets you control seasoning.
- Decorations: Red and green sprinkles for a festive finish; use nonpareils or sanding sugar depending on the look you want.
Instructions
Preheat and prepare pan: Preheat the oven to 325°F (160°C). Line a standard 12-cup mini muffin pan with paper liners and lightly spray or brush the liners if desired to make removal easier. Preheating ensures even baking and prevents the centers from overcooking while the edges set. Make the crust: In a small bowl, combine 1/4 cup crushed graham crackers with 1/4 cup melted butter until the mixture resembles wet sand. Press about 1 teaspoon of the mixture firmly into the bottom of each lined cup to form an even layer. Pressing firmly helps the crust hold together after baking. Prepare the filling: In a medium bowl, beat 8 oz softened cream cheese with 1/2 cup sugar until completely smooth and no lumps remain—about 2 to 3 minutes using an electric mixer. Scrape the bowl, then add 1 teaspoon vanilla extract and 1/2 cup sour cream; mix until combined. Add the eggs one at a time, mixing on low speed after each addition just until combined. Avoid overbeating to prevent too much air, which can cause cracks. Assemble: Divide the cheesecake batter evenly among the 12 prepared liners, filling nearly to the top but leaving a small rim to prevent overflow. A small cookie scoop helps portion evenly and keeps the process quick. Bake: Bake at 325°F (160°C) for about 20 minutes, or until the centers are set but still have a slight jiggle. The edges should be slightly puffed and the tops should not brown significantly. Overbaking will cause a dry texture, so check at 18 minutes if your oven runs hot. Cool and chill: Let the cheesecakes cool to room temperature in the pan, then transfer to the refrigerator and chill for at least 2 hours to fully set. Chilling improves texture and makes removal easier. When ready to serve, top with red and green sprinkles.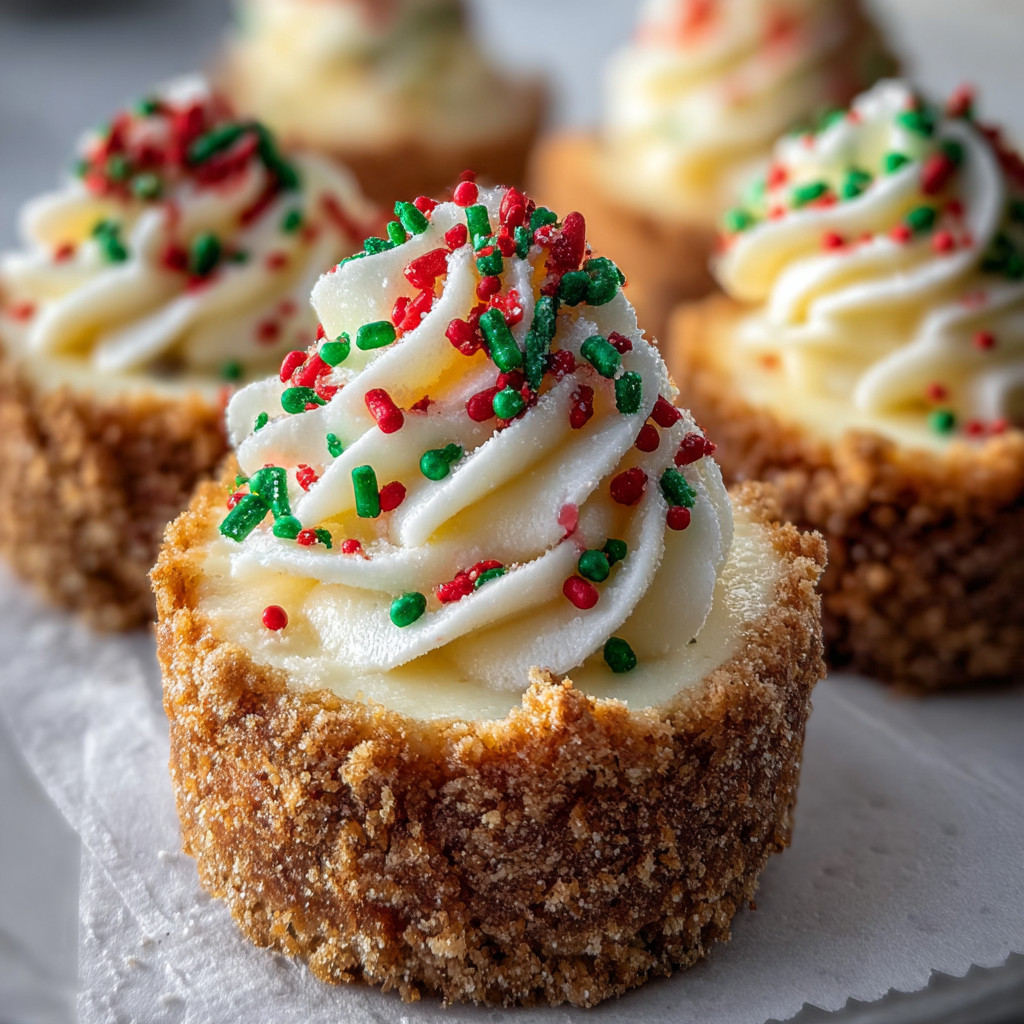
You Must Know
- These keep well refrigerated for up to 4 days in an airtight container; freeze for up to 3 months wrapped individually in plastic and placed in a freezer-safe container.
- They are high in dairy and eggs, so they are not suitable for those with dairy or egg allergies; each mini cheesecake is approximately 170–200 kcal depending on the brand of ingredients used.
- Room-temperature cream cheese yields the smoothest filling—if it’s too cold, the batter will be lumpy; if too warm, the batter can become overly soft and thin.
- Do not overmix the batter; mixing too long incorporates air that can cause cracking and an uneven surface.
My favorite part is how simple decoration transforms them into something special. One year my daughter arranged sprinkles into tiny wreaths—simple, joyful, and it made guests smile. These small finishes make them memorable without adding time.
Storage Tips
Store chilled mini cheesecakes in a single layer in an airtight container to maintain the crust's texture. If stacking is necessary, separate layers with parchment paper. Refrigerated, they remain at peak quality for 3 to 4 days. For longer storage, freeze individual cheesecakes on a baking sheet until firm, then transfer to a freezer bag or container for up to 3 months. Thaw overnight in the refrigerator and add sprinkles just before serving. Avoid leaving them at room temperature for more than two hours to prevent spoilage.
Ingredient Substitutions
To make a lighter version, substitute half of the cream cheese with neufchatel cheese or use reduced-fat cream cheese, though texture will be slightly less rich. For a gluten-free option, use gluten-free graham crumbs or finely chopped gluten-free cookies for the crust. If you prefer non-dairy, try a firm vegan cream cheese and a plant-based sour cream alternative; results will differ in flavor and texture and may require a brief adjustment in chilling time. Swap vanilla extract for almond extract (1/2 tsp) for a festive, nutty variation.
Serving Suggestions
Serve these warm or chilled as part of a holiday dessert spread with mulled cider or spiced hot chocolate. For a grown-up twist, top with a spoonful of warmed cranberry compote or a smear of salted caramel. Garnish with a tiny mint leaf for contrast or place each mini cheesecake on a decorative liner for gifting. They make an elegant addition to brunch buffets or after-dinner platters paired with fresh berries.
Cultural Background
Cheesecake has ancient roots, with early versions traced to Greece and later adaptations across Europe. The American graham-cracker crust became popular in the early 20th century and is now a hallmark of many U.S. cheesecake styles. These mini cheesecakes blend classic American ingredients with festive decoration traditions—red and green sprinkles are a modern holiday touch that transforms a familiar dessert into a seasonal favorite.
Seasonal Adaptations
Swap sprinkles for autumn tones in fall—use orange and brown sanding sugar—or top with miniature candy canes for a peppermint finish. For summer gatherings, omit holiday sprinkles and add a topping of macerated strawberries or a lemon curd dollop. Small changes to garnishes and extracts can shift the personality of this treat throughout the year without changing the basic method.
Meal Prep Tips
Make the crust and filling ahead of time and refrigerate them separately for up to 24 hours; assemble and bake when ready to serve. If you plan a big gathering, bake multiple pans and chill them overnight; store in single layers to preserve presentation. Use a small cookie scoop to speed up portioning and ensure consistent baking. Label containers with the date when freezing to track freshness.
These mini cheesecakes are a small but meaningful way to celebrate—easy to make, easy to share, and always greeted with a smile. Try them once and you’ll find many opportunities to bring them out through the holidays.
Pro Tips
Use room-temperature cream cheese and eggs to create a smooth batter without lumps.
Avoid overmixing to prevent too much air which can cause cracks and a drier texture.
Chill for at least two hours; overnight chilling improves texture and flavor.
Press the crust firmly into the liner so it holds together when eating.
Portion with a small cookie scoop for even baking and uniform sizes.
This nourishing mini christmas cheesecakes recipe is sure to be a staple in your kitchen. Enjoy every moist, high protein slice — it is perfect for breakfast or as a wholesome snack any time.
FAQs about Recipes
How can I tell when they are done?
If the centers are still jiggly they will firm during chilling; bake until edges are set and center has a slight jiggle.
Can I freeze them?
Freeze on a tray until solid, then transfer to a sealed container for up to 3 months.
Tags
Mini Christmas Cheesecakes
This Mini Christmas Cheesecakes recipe makes perfectly juicy, tender, and flavorful steak every time! Serve with potatoes and a side salad for an unforgettable dinner in under 30 minutes.
Ingredients
Crust
Filling
Decoration
Instructions
Preheat and prepare pan
Preheat oven to 325°F (160°C). Line a 12-cup mini muffin pan with paper liners and lightly grease if desired to ease removal.
Combine crust ingredients
Mix 1/4 cup crushed graham crackers with 1/4 cup melted butter until the mixture resembles wet sand. Press about 1 teaspoon into the bottom of each liner.
Make the filling
Beat 8 oz softened cream cheese with 1/2 cup sugar until smooth. Add 1 teaspoon vanilla and 1/2 cup sour cream, then incorporate eggs one at a time, mixing until just combined.
Assemble and bake
Spoon the filling into the prepared cups nearly to the top and bake for 20 minutes until centers are set with a slight jiggle. Cool to room temperature, then chill for at least 2 hours.
Decorate and serve
Once chilled, top each mini with red and green sprinkles. Serve chilled or slightly warmed; store leftovers in an airtight container in the refrigerator.
Last Step: Please leave a rating and comment letting us know how you liked this recipe! This helps our business to thrive and continue providing free, high-quality recipes for you.
Nutrition
Did You Make This?
Leave a comment & rating below or tag
@easywhiskrecipes on social media!
Categories:
You might also like...

Instant Pot Creamy Chicken and Rice
A quick and comforting one pot dinner of tender chicken, creamy rice, and vegetables cooked together in the Instant Pot for an easy weeknight meal.

Cinnamon Roll Pancake Stacks
Fluffy pancakes swirled with a warm cinnamon filling and finished with a silky cream cheese glaze. Perfect for weekend brunches and cozy mornings.

Caramel Apple Cheesecake Bars
Buttery graham crust, creamy cheesecake, spiced Granny Smith apples, crunchy streusel, and a ribbon of homemade caramel — perfect dessert bars for gatherings.
Did You Make This?
Leave a comment & rating below or tag @easywhiskrecipes on social media!
Rate This Recipe
Share This Recipe
Enjoyed this recipe? Share it with friends and family, and don't forget to leave a review!
Comments (1)
This recipe looks amazing! Can't wait to try it.
Comments are stored locally in your browser. Server comments are displayed alongside your local comments.

Hi, I'm Sophie!
What's Popular

30-Minute Meals!
Join to receive our email series which contains a round-up of some of our quick and easy family favorite recipes.